


Introduction
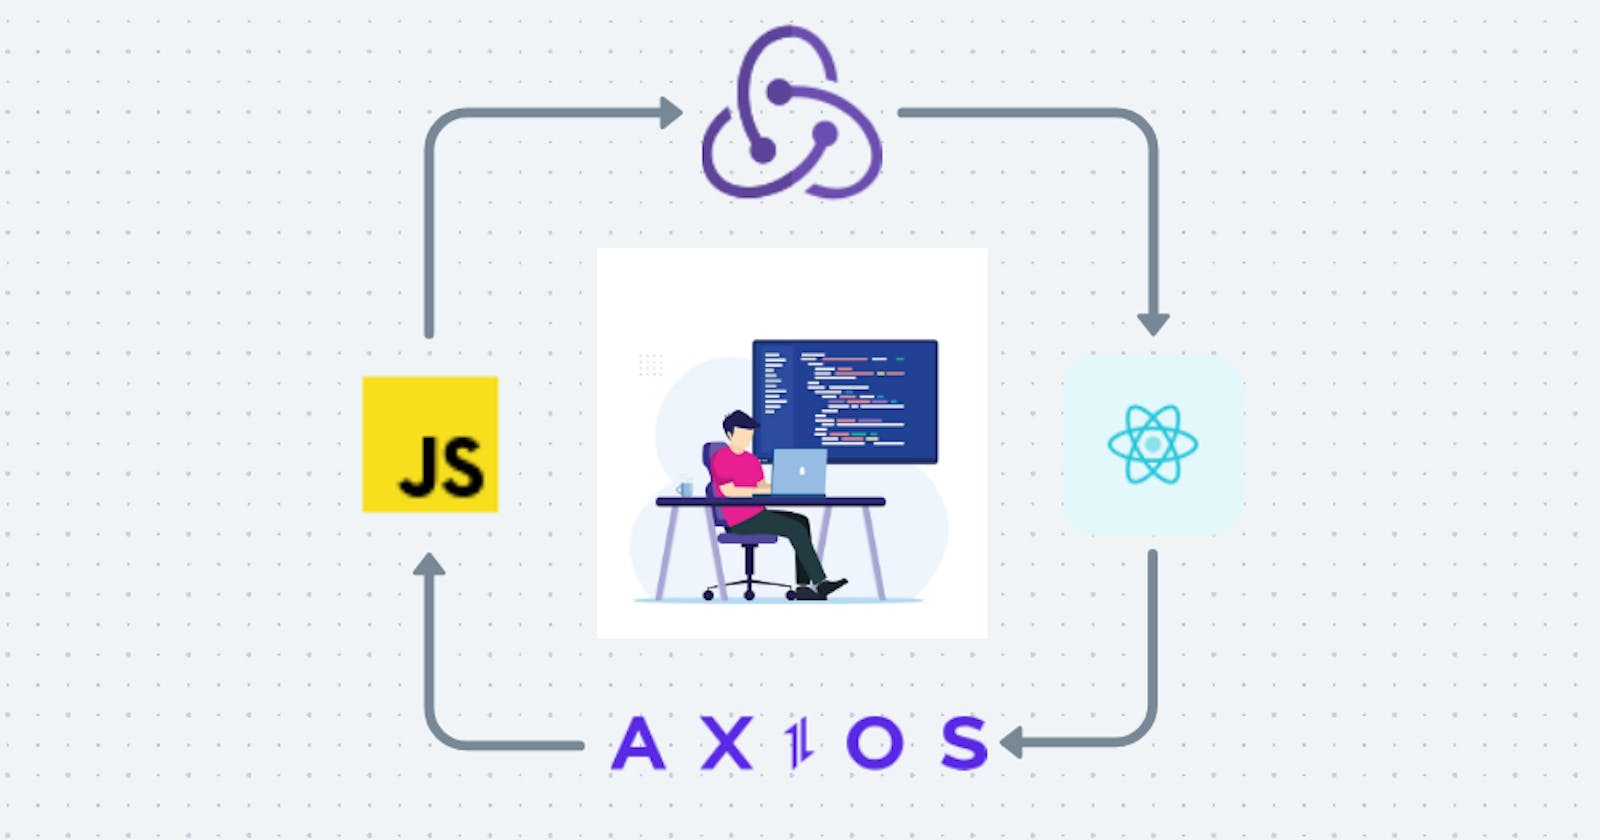
Redux helps manage the state in React, and Redux Toolkit is a setup that makes it easier to use Redux with React. In this blog post, we'll explore how to fetch data using Redux Thunk, a part of React Redux, along with Axios, which is a React library.
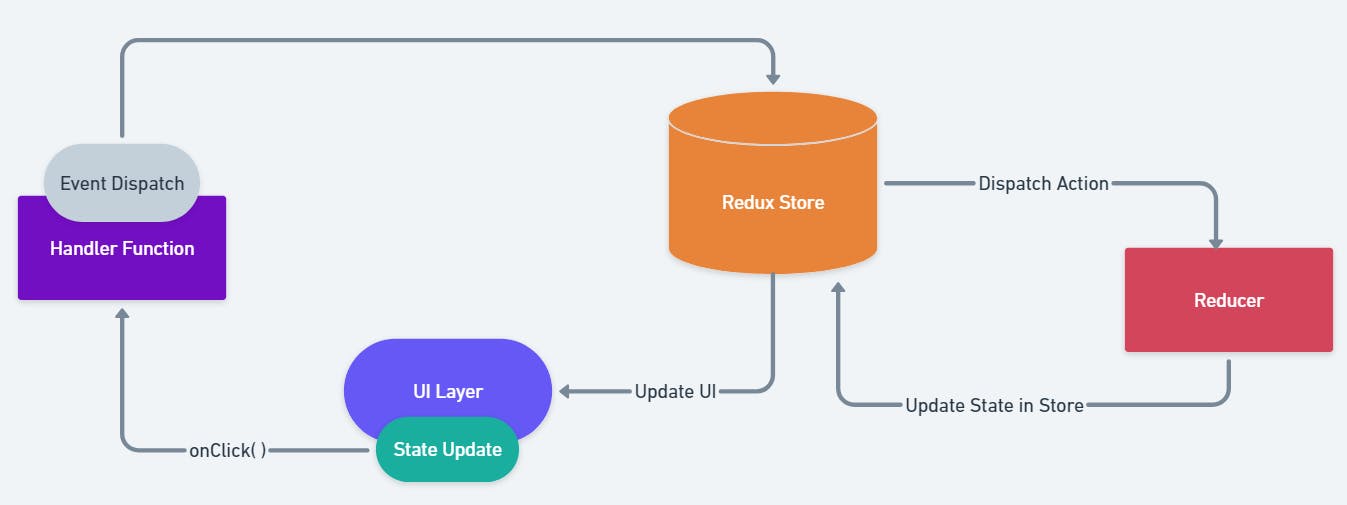
To begin, let's Understand the flow of React Redux from the below image that explores various features such as reducers, Redux store, event dispatch, and handler functions. This will provide us with a basic understanding of the components that Redux Toolkit simplifies.
Installation & Setup
First, Create a new React app and navigate into the app
npx create-react-app react-axios-demo
cd react-axios-demo
Install the necessary dependencies for the project.
npm install axios react-redux @reduxjs/toolkit
Fetching APIs Using Axios and Redux thunk
We'll construct the code following the flowchart explanation of React Redux outlined above, making the process more straightforward.
Building Reducers and slices
As indicated in the flowchart, creating a Redux store is essential to store states, and reducers are necessary to update these states. Let's proceed to build these components.
Store.js - The Redux store is set up using the
configureStoremethod from the Redux Toolkit. This method takes reducers as inputs. Since we're using the Redux Toolkit, these reducers come in the form of slices, placed in different locations for simplicity.import { configureStore } from "@reduxjs/toolkit"; import todoReducer from "./slice/todo.js"; export const store = configureStore({ reducer: { todo: todoReducer, } });Slice/todo.js -It is a file in the Slice folder, where we provide reducers used to update the state in the store based on the actions dispatched from the event handler via the Redux store.
Here, the
createSlicemethod accepts arguments such asname, indicating the name of the reducer. TheinitialStateparameter reduces the need for us to manually assign states in various edge cases. Additionally,extraReducerscomes with built-in methods that we can use to perform actions at different stages of the API fetching process.We also utilize the
axioslibrary to fetch APIs using a specific HTTP request, 'get', which extracts the data from the URL. Axios provides out-of-the-box features for handling APIsimport { createSlice, createAsyncThunk } from "@reduxjs/toolkit"; import axios from "axios"; // Action export const fetchTodos = createAsyncThunk('fetchTodos', async () => { const response = await axios.get('https://jsonplaceholder.typicode.com/todos'); return response.data; }) // Slice const todoSlice = createSlice({ name: 'todo', initialState: { isLoading: false, data: null, isError: false, }, extraReducers: (builder) => { // API Fetching (GET) is pending builder.addCase(fetchTodos.pending, (state, action) => { state.isLoading = true; }); // API Request fulfilled (Success) builder.addCase(fetchTodos.fulfilled, (state, action) => { state.isLoading = false; state.data = action.payload; }); // Request is rejected builder.addCase(fetchTodos.rejected, (state, action) => { state.isError = true; console.error("Error", action.error); }); } }) const todoReducer = todoSlice.reducer; export default todoReducer;
Building UI
App.jsx - We will fetch data from the API when the
onClick()function is triggered. Subsequently, we display the retrieved data on the webpage, and the code incorporates styling using Tailwind CSS.import React from 'react'; import { useDispatch, useSelector } from 'react-redux'; import { fetchTodos } from './redux/slice/todo'; const App = () => { const dispatch = useDispatch(); const state = useSelector((state) => state); if (state.todo.isLoading) { return ( <div className=" flex items-center justify-center h-screen"> <h1 className="text-4xl font-bold">Loading....</h1> </div> ); } return ( <div className="max-w-md mx-auto p-4"> <button onClick={(e) => dispatch(fetchTodos())} className="bg-blue-500 text-white font-bold py-2 px-4 rounded mb-4"> Fetch Data </button> {state.todo.data && ( <ul> {state.todo.data.map((e) => ( <li key={e.id} className="mb-2 p-2 bg-gray-100 rounded"> {e.title} </li> ))} </ul> )} </div> ); }; export default App;Index.js - This is the root file that React will render on the webpage. Here, we provide the store as props to the
Provider, which wraps theApp.jsxfileimport React from "react"; import ReactDOM from "react-dom/client"; import App from "./App"; import { Provider } from "react-redux"; import { store } from "./redux/store"; const root = ReactDOM.createRoot(document.getElementById("root")); root.render( <React.StrictMode> <Provider store={store}> <App /> </Provider> </React.StrictMode> );
Rendering & Testing
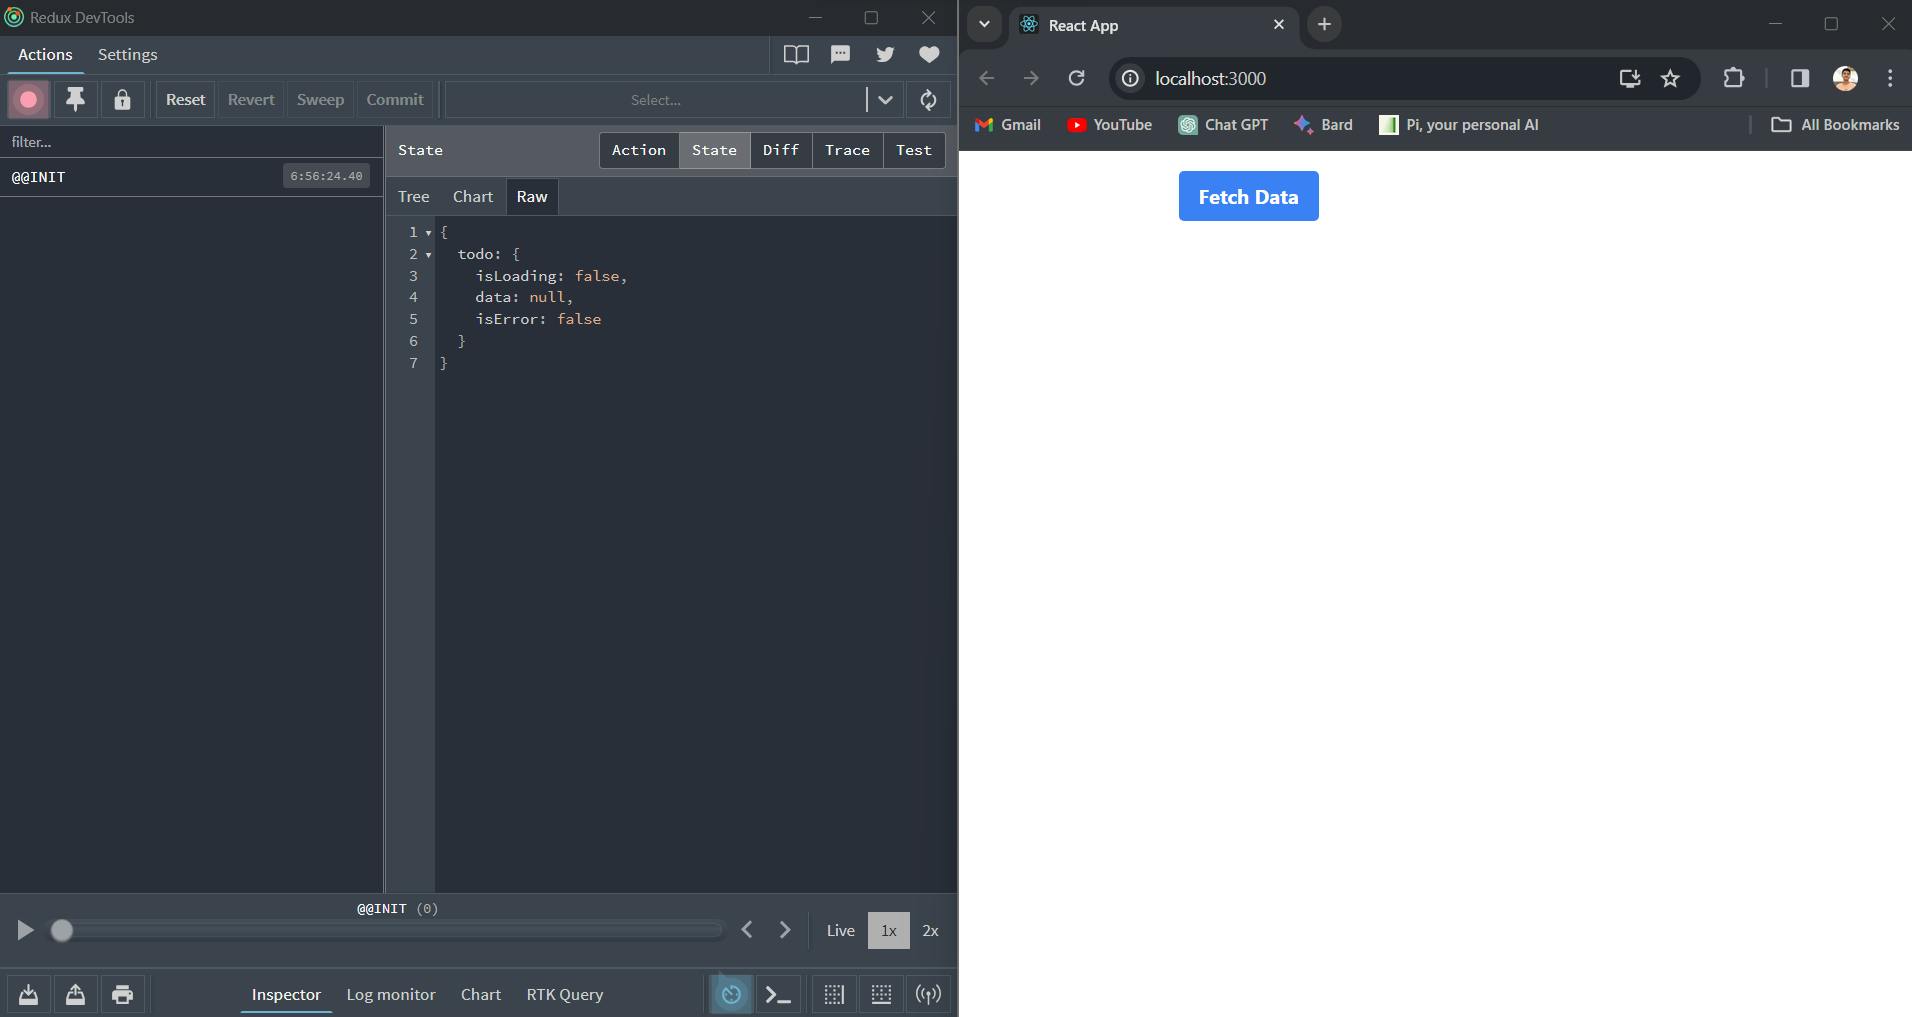
In this process, we utilize an extension called Redux Dev Tools to inspect the states in the context of React Redux. This extension provides us with convenient tools right from the beginning for testing React Redux states.
To see it in action, run the following command:
npm start
Here, the image below displays the states in Dev Tools and the webpage before fetching data from the API. It illustrates the states before data retrieval in raw format, where the default states are set to false and data to null.
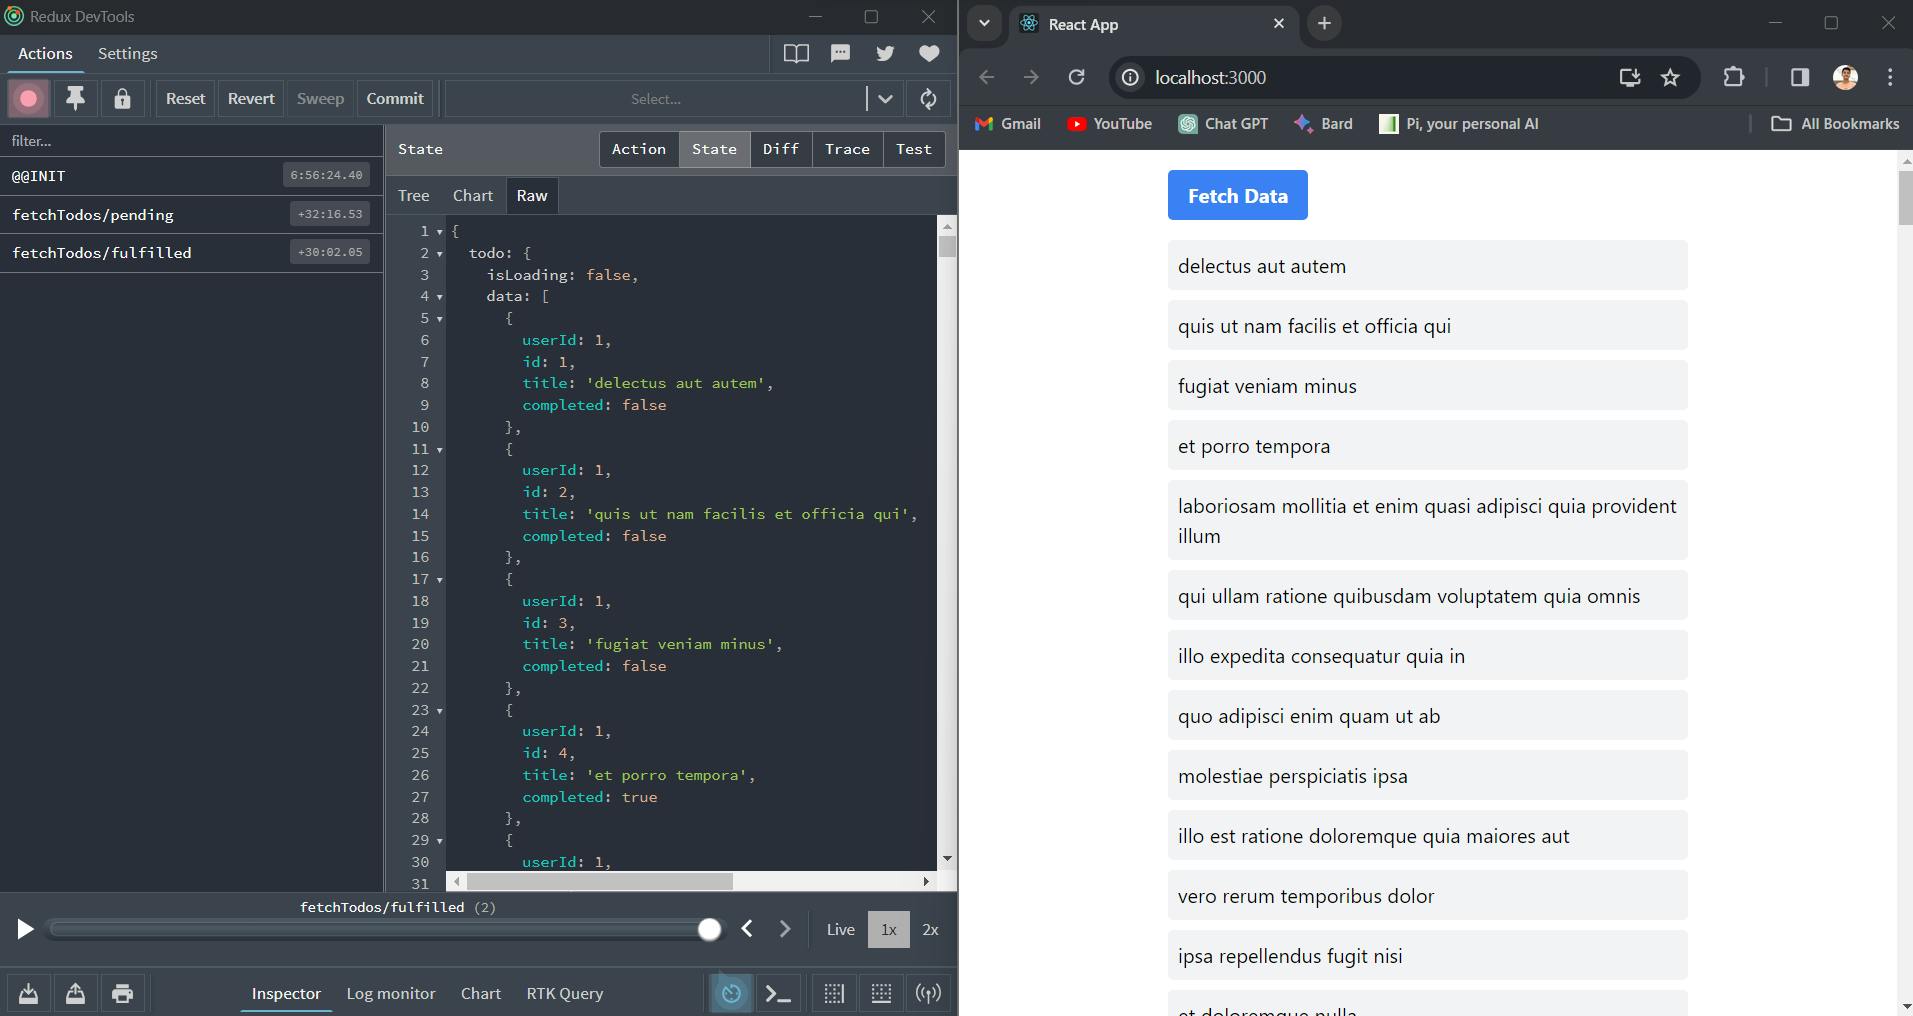
Now, after fetching data and moving past the loading stage, the Dev Tools display the states and the retrieved data. The data (todos) is subsequently rendered on the webpage.
Final thoughts
In conclusion, the Redux Toolkit simplifies our tasks and proves to be very useful for fetching APIs. Additionally, we make use of the Axios library to make API fetching even easier.
Resources
Redux toolkit Official Documentation: https://redux-toolkit.js.org/introduction/getting-started
Axios React GitHub Repository: https://github.com/axios/axios